Looking for durable, easy-to-install tin ceiling tiles that elevate kitchens, bars, or dining areas? This guide highlights top nail-up tin ceiling tile kits ideal for DIY projects. Best for homeowners and contractors seeking quick installation, classic aesthetics, and sustainable materials. Each product is evaluated for install ease, size, and suitability across residential and light commercial spaces.
| Product | Tile Size | Pack | Best For |
|---|---|---|---|
| American Tin Ceilings Pattern #2 (n-p02-raw) | 24″ x 24″ | 5 tiles | Modern rustic kitchens and bars |
| American Tin Ceilings Pattern #3 (n-p03-raw) | 24″ x 24″ | 5 tiles | Small to medium ceilings with vintage flair |
| Holydecot Tin Wall Tiles 24×24 (Antique White) | 24″ x 24″ | 5 tiles | Custom patio, kitchen backsplashes, ceilings |
| Holydecot Tin Wall Tiles 12×12 Sample (5 Pack) | 12″ x 12″ panels | 5 samples | Precise area planning and design tests |
| American Tin Ceilings Pattern #19 Brushed Satin Nickel | 24″ x 24″ | 5 tiles | Contemporary, metallic finish looks |
American Tin Ceilings Pattern #2 Nail-Up Kit

Best for: spaces seeking a clean, rustic-industrial look. The kit includes five 24″ x 24″ tiles made from 25% recycled tin-plated steel, with a 1/4″ nail rail to create tight, nearly invisible seams. The 20 sq ft coverage suits kitchens, bars, and small commercial ceilings. Limitation: tiles are thin at .01 inches, so careful handling during cut and install is recommended.
American Tin Ceilings Pattern #3 Nail-Up Kit

Best for: readers wanting a more ornate Victorian-inspired design. The kit contains five 24″ x 24″ tiles with a pattern that blends floral arching diamonds. Construction uses a 1/4″ nail rail for overlap seams, delivering a near-seamless appearance. Caution: similar to other tin options, ensure a suitable substrate for nail installation to prevent warping over time.
Holydecot Tin Wall Tiles 24×24 (Antique White) 5 Pack
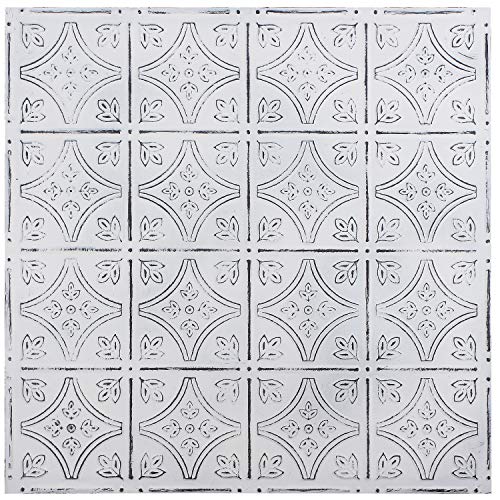
Best for: DIY renovations with a classic antique white finish. These 24″ x 24″ panels are nail-up and easy to cut, suitable for ceilings, stair risers, or decorative backsplashes. Limitation: can require wood substrate for ceiling installation; backsplashes use adhesive in addition to nails. Choose this if you want a traditional white tin look with straightforward cutting.
Holydecot Tin Wall Tiles 12×12 Sample Pack
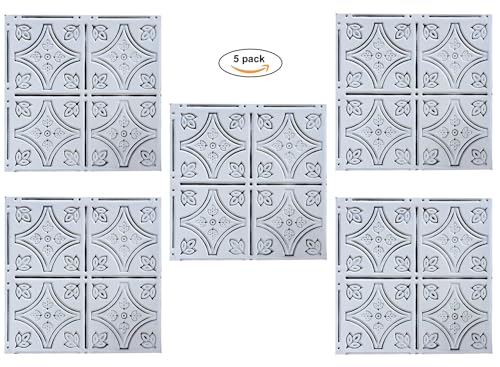
Best for: testing scale and pattern before committing to a full sheet. This 5-pack includes 12″ panels, which are not designed to fill a standard grid without additional layout planning. Useful for small areas, stairs, or accent walls. Limitation: not a full 24″ grid; may require planning for seamless alignment in larger installations.
American Tin Ceilings Pattern #19 Brushed Satin Nickel

Best for: spaces seeking a contemporary metallic finish with a brushed nickel look. The five tiles share the same nail-up installation method and 24″ x 24″ size, covering about 20 sq ft. A limitation is similar to other tin tiles: an appropriate substrate and careful nail work are needed to maintain a clean finish.
Buying Guide: Nail-Up Tin Ceiling Tiles
What should you consider before buying? Here are practical questions and answers to guide selection.
- What is the tile size and how much area does it cover? Most kits offer 24″ x 24″ tiles with a 20 sq ft coverage per box, which is ideal for mid-sized rooms. If your ceiling is larger, plan multiple packs.
- What installation method is used? Nail-up requires a wood or sturdy substrate and basic cutting with tin snips. Ensure you have a stable substrate and appropriate nail tools.
- Is the finish and pattern important? Pattern #2 provides a clean, modern look; Pattern #3 adds a Victorian feel; Brushed Satin Nickel offers a contemporary metal sheen. Choose based on room style and existing fixtures.
- Are there sustainability considerations? Several kits use tin-plated steel with recycled content, appealing to eco-conscious projects.
- What are handling and cutting considerations? Tiles are thin (.01 inch) and require careful handling to avoid dents. Pre-cut a test piece for planning.
What to look for in a nail-up tin tile kit
- Substrate requirements and installation ease
- Tile pattern and finish compatibility with the space
- Total coverage per pack and potential waste from cuts
- Local building codes and ventilation considerations for ceilings
Quick comparison at a glance
- Best for modern kitchens: Pattern #2 and Pattern #19 Brushed Satin Nickel
- Best for vintage aesthetics: Pattern #3 and Antique White Holydecot tiles
- Best for testing layout: 12×12 Holydecot sample pack
FAQ
- Q: Do these tiles require special tools? A: A standard tin snips and a measuring tool are typically sufficient; nails and a hammer complete the nail-up process.
- Q: Can these be used for walls or backsplashes? A: Yes, many can be used as backsplashes or wall accents with proper mounting and adhesives where needed.
- Q: Do they come pre-finished? A: Finishes vary by pattern; some have unfinished tin that may require sealing or paint for a desired look.
- Q: How do I prevent seams from showing? A: Use the 1/4″ nail rail and precise alignment between panels to create tight seams.
- Q: Is there maintenance required after installation? A: Periodic cleaning and light dusting are typically sufficient; avoid harsh scrubbing that could scratch the surface.